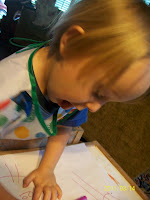
In my last art lesson about the wiggle squiggle we were primarily concerned with our marking device and substrate. In this lesson we will cover a few more steps that will be necessary for paint preparation.
First I recommend a good work table.

Here we have laid out our tools and I am preparing a cleaning solution for my brushes. I use a drop of soap in less than warm water. ( Hot water can damage your brushes! )
I like to sketch out an idea before I just start slapping paint around.
You might not get it right immediately but the paint can hide your draft pretty easily. While you are sketching you will begin to get an idea or feel of what colors will be needed. The process of creation differs for everybody but a good period of some type of concentration offer more rewarding results.
 Once we are ready to add color to our piece
I find it helpful to get our canvas elevated onto an easel. I would love a windmill easel but for now a basic A-Frame will suffice. Ikea offers a very affordable solution.
We are not going to paint directly on the surface and this simple easel doesn't offer quick mounting so we will need to incorporate an adhesive. Painters tape is wonderful because it is strong enough to hold our paper and weak enough to not damage it once it is easily removed. Unfortunately I was on a tape ball binge recently and was out of the blue tape so we are going to use the left-over invisible office tape from gift wrapping season.
About one inch strips in the corners will help and I also suggest smaller pieces in the middles to prevent sag.
Now on to our paint!
I chose to work with washable finger-paint because of of its slower drying time, bold primary colors and general availability.
We will use lids to old containers as our mixing palate. In addition to the base colors in the pack we mixed a violet by combining red and blue. The other lid was used for yellow + red = orange.
Now that we are all set let's paint! Explore the depth of your imagination a bring your ideas to life.
I know, I know "Those are finger-paints! Why are you using a brush Ms. Lizbet ?" well.. As I mentioned before finger-paints are slower to dry especially compared to some higher end paints we will use in the future and they hold thicker than your standard water colors. I use the brush to get better control over blends than i do with my hands, but this does not rule out fingers, sticks, stamps, or toes..
When we are all finished we will clean up our brushes, wash our hands, and patiently wait for our piece to dry.
Thanks for joining me today and a really big thanks goes out to my aunts for their support and materials. Love you guys xoxoxo
Come back soon for some great tips on preparing our station and canvas. Until next time - bye bye.


No comments:
Post a Comment